I got following error while running artisan tinker thru Google Compute VM console:
project@projectserver1:/var/www/html/Project_October$ php ./artisan tinker

In Configuration.php line 363:

mkdir(): Permission denied
And here is why and how to fix it:
This error occurs because you switch user (guessing using su) without “dash” option.
Replace su www-data with su - www-data and everything should works!
psysh tries to write runtime data in “original user” folder, instead of in “current user” folder…
PS my “current user” has XDG_RUNTIME_DIR env defined. Switching user without -, forced www-data to use the same env variable, while www-data hasn’t write permission in that folder.
In years of development of project, it could be contains tons of features that consisted from hundred of controllers and thousand methods, it’s usually take time to specify where is current Controller name and Method name that is being requested by the browser at the time, here is the tip about how find it out:
dd(\Route::currentRouteAction());
put that line code somewhere in your base controller or middleware.
╭─yoesoff@yoesoff-ThinkPad-X220 ~/Development/DBMigration
╰─➤ php ./artisan migrate:reset

Symfony\Component\Debug\Exception\FatalThrowableError : Class 'Doctrine\DBAL\Driver\PDOSqlite\Driver' not found

at /home/yoesoff/Development/DBMigration/vendor/laravel/framework/src/Illuminate/Database/SQLiteConnection.php:64
 60| * @return \Doctrine\DBAL\Driver\PDOSqlite\Driver
 61| */
 62| protected function getDoctrineDriver()
 63| {
 > 64| return new DoctrineDriver;
 65| }
 66| }
 67|

Exception trace:

1 Illuminate\Database\SQLiteConnection::getDoctrineDriver()
 /home/yoesoff/Development/DBMigration/vendor/laravel/framework/src/Illuminate/Database/Connection.php:884

2 Illuminate\Database\Connection::getDoctrineSchemaManager()
 /home/yoesoff/Development/DBMigration/vendor/laravel/framework/src/Illuminate/Database/Schema/Grammars/SQLiteGrammar.php:244

Please use the argument -v to see more details.
I got following errors after tried to run docker-compose up (later I realized that it was not an error but the service(s)/container(s) is already running )
╭─yoesoff@yoesoff-ThinkPad-X220 ~/Development/Obunda_October ‹feature/First-Setup*›
╰─➤ docker-compose up
Starting obundaoctober_obunda_october_1 ...
Starting obundaoctober_obunda_october_1 ... error

ERROR: for obundaoctober_obunda_october_1 Cannot start service obunda_october: driver failed programming external connectivity on endpoint obundaoctober_obunda_october_1 (53c195720a02841c1a5c3f5c123af4b634d1ccbd9b42195dac3e4704f92574e0): Bind for 0.0.0.0:8181 failed: port is already allocated

ERROR: for obunda_october Cannot start service obunda_october: driver failed programming external connectivity on endpoint obundaoctober_obunda_october_1 (53c195720a02841c1a5c3f5c123af4b634d1ccbd9b42195dac3e4704f92574e0): Bind for 0.0.0.0:8181 failed: port is already allocated
ERROR: Encountered errors while bringing up the project.
This error occurred because the container(s) is already up/running (usually because of auto start after the host booted) and used/locked the port(s).
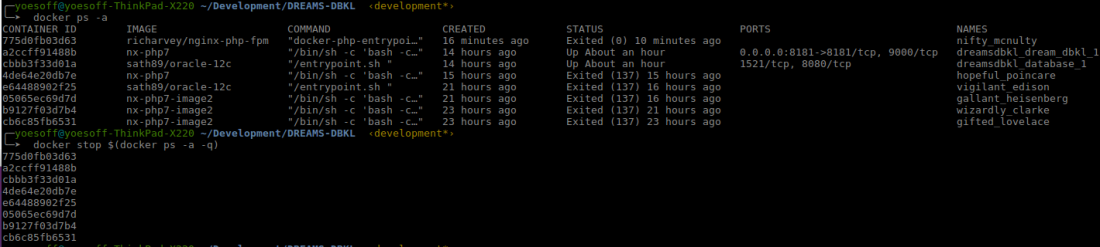
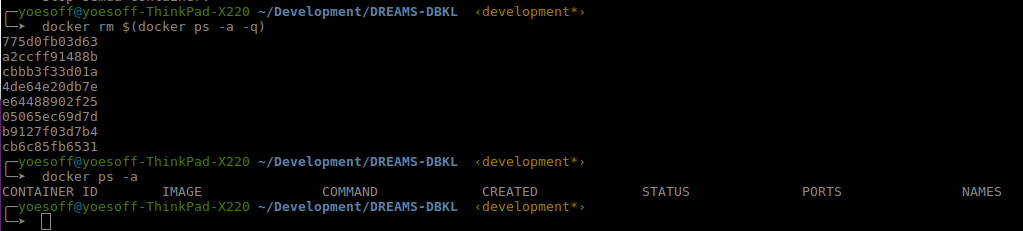
If it’s happened to you just check the service and make sure that the service is already running or not, if the service already up that it means you no need to run docker-compose up again, but if you still want to use docker-compose up then you have to stop all running container(s) that locked your port by using following command:
╭─yoesoff@yoesoff-ThinkPad-X220 ~/Development/Obunda_October ‹feature/First-Setup*›
╰─➤ docker-compose up
Starting obundaoctober_obunda_october_1 ...
Starting obundaoctober_obunda_october_1 ... done
Attaching to obundaoctober_obunda_october_1
obunda_october_1 | Do not run Composer as root/super user! See https://getcomposer.org/root for details
obunda_october_1 | Loading composer repositories with package information
obunda_october_1 | Installing dependencies (including require-dev) from lock file
obunda_october_1 | Nothing to install or update
obunda_october_1 | Generating autoload files
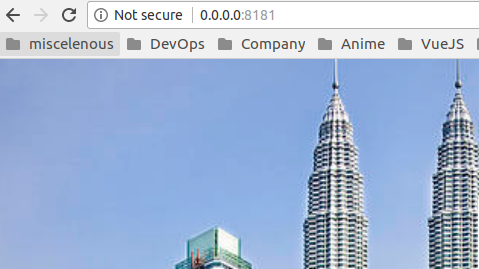
obunda_october_1 | Laravel development server started: <http://0.0.0.0:8181>
Then the service is running at http://0.0.0.0:8181 as usual.
*Ini catatan pribadi bukan tutorial, tapi kalo mau nanya-nanya silahkan ke: mhyusufibrahim@gmail.com
Setup Laravel dengan menggunakan Docker containers adalah hal yang umum dilakukan saat ini dalam mengkonfigurasi lingkungan kerja (bahkan production) dalam pengembangan Web karena teknologi-teknologi tersebut hingga saat ini adalah hal yang masih cukup hangat untuk dibicarakan.
Saya akan mencoba belajar dengan tutorial ini dengan beberapa modifikasi.
Sebelum mulai ini detail env di laptop yang saya gunakan (Thinkpad X220)
╰─➤  docker -v; docker-compose -v; lsb_release -a

Docker version 17.12.1-ce, build 7390fc6

docker-compose version 1.17.0, build ac53b73

No LSB modules are available.

Distributor ID: Ubuntu

Description: Ubuntu 16.04.4 LTS

Release: 16.04

Codename: xenial
Ubuntu 16.04 PHP 7.2 FPM container image for PHPDocker.io projects. Packages are provided by Ondřej Surý.
Smaller in size than PHP’s official container (170MB vs 501MB) plus you don’t need to install any build dependencies let alone compile anything, Dotdeb already ship binaries for the vast majority, if not all, of PHP extensions available on PHP7.
Perintah untuk membuat Image berdasarkan konfigurasi DockerFile di currrent project folder.
Bila saat proses build terjadi error sbb: “Err:1 http://archive.ubuntu.com/ubuntu xenial InRelease” ikuti solusi ini. Bila tidak berhasil coba ganti network provider internet anda.
“Docker pull adalah proses mengambil image atau a repository dari sebuah registry”
– Nobita 2099
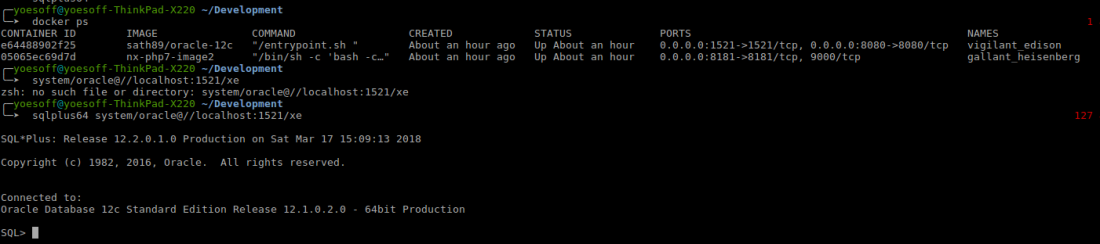
Jalankan Containers di Background
docker run -d -p 8080:8080 -p 1521:1521 sath89/oracle-12c
List of Running Containers
docker ps
Instalasi SQLPLUS (Sejenis dengan psql milik PostgreSQL)
Artikel yang mengulas SQLPLUS lebih dalam berbahasa Indonesia baca disini.
Uppsss! mari install dulu
SQL*Plus Overview
SQL*Plus is an interactive and batch query tool that is installed with every Oracle Database installation. It has a command-line user interface, a Windows Graphical User Interface (GUI) and the iSQL*Plus web-based user interface.
There is also the SQL*Plus Instant Client which is a stand-alone command-line interface available on platforms that support the OCI Instant Client. SQL*Plus Instant Client connects to any available Oracle database, but does not require its own Oracle database installation. See the Oracle Call Interface Programmer’s Guide for more information on the OCI Instant Client.
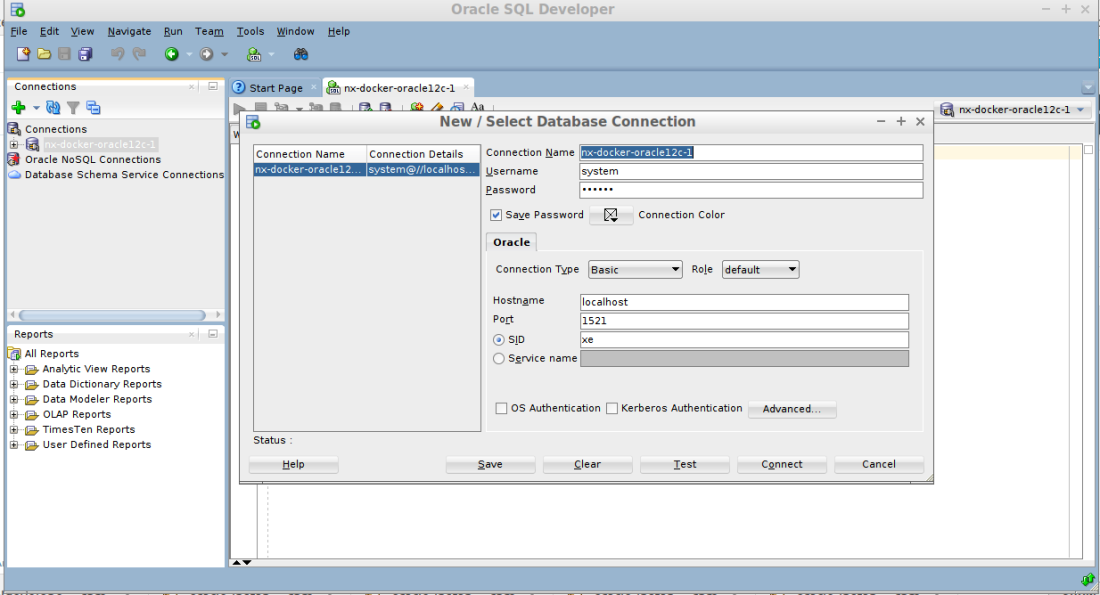
Setting Koneksi ke database yang berada didalam kontainer
hostname: localhost
port: 1521
sid: xe
service name: xe
username: system
password: oracle
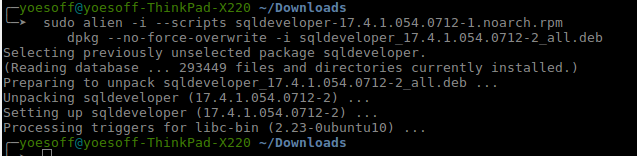
Koneksi dari Oracle SQL Developer ke Oracle DB 12c yang berada di Container
Sampai disini kita mempelajari hal lain yaitu:
Pull image dan menjalankan container Oracle DB 12c.
Menginstal dan login ke SQLPLUS di console terminal.
Mengistall GUI Buat Oracle 12c yaitu Oracle SQL Developer
Jadi Sampai disini kita sudah memiliki beberapa hal penting:
Container yang berisi PHP7 (Dengan custom Image)
Container yang berisi Oracle 12c
SQLPLUS Oracle SQL Developer
Selanjutnya mari setup docker compose…!
Docker Compose
“Compose is a tool for defining and running multi-container Docker applications. ” Spongebob
Docker Compose
Compose is a tool for defining and running multi-container Docker applications. With Compose, you use a Compose file to configure your application’s services. Then, using a single command, you create and start all the services from your configuration.
Mau tau lebih banyak tentang docker-compose ? baca aja ini dan ini.
Mari kita mulai dengan memastikan Docker Compose itu sendiri sudah ada di Laptop atau PC kita:
Lihat, error diatas menyuruh kita menyiapkan file docker-compose.yml
Membuat file docker-compose.yml (Sejajar folder app)
Image yang dipakai nx-php7 (Build ulang aja yang sebelumnya nx-php7-image jadi nx-php7)docker-compose up (matikan: docker-compose stop)
Dockerfile
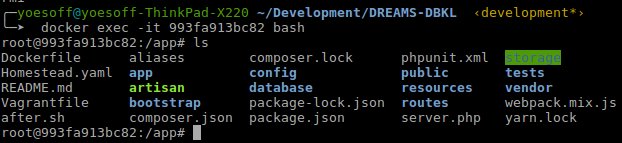
╭─yoesoff@yoesoff-ThinkPad-X220 ~/Development/DREAMS-DBKL ‹development*›
╰─➤ ccat Dockerfile
FROM phpdockerio/php72-fpm

# https://medium.com/@shakyShane/laravel-docker-part-2-preparing-for-production-9c6a024e9797
COPY . /var/www
WORKDIR /var/www

# Do not execute composer as root
# RUN useradd -ms /bin/bash phpguy
# set phpguy as sudoer
# RUN adduser phpguy sudo
# switch current user
# USER phpguy
# *Docker root is not Host's root, so it's ok to root inside container CMIIW
# RUN composer install

# better way to run composer: https://stackoverflow.com/questions/46786589/running-composer-install-within-a-dockerfile
CMD bash -c "composer install && php artisan serve --host=0.0.0.0 --port=8181"
#CMD bash -c "composer install"

EXPOSE 80
Pada postingan ini saya membuat catatan untuk memudahkan kembali saya mengingat-ingat apa yang telah saya lakukan dan saya pelajari. Kali ini saya mencoba mempelajari Laravel 5.5 LTS dengan VueJS (Laravel+Vue saya lihat sebagai sebuah pasangan serasi untuk web development modern saat ini).
Catatan ini sendiri tidak akan ada banyak tulisan karena proses instalasi Laravel dan VueJS sendiri berada di artikel lain yang terpisah yaitu Larastart yang sebelumnya telah saya buat (Artikel catatan tentang Larastart ini cukup panjang dan tidak begitu rapih).
Mari kita mulai mencatat dengan snapshot:
Tahap 1. Generate Model dan Migration
php artisan make:model Guestbook/Signature -m
Ketika menyertakan -m mala akan memberikan tanda pada command untuk juga menggenerate migration untuk kita, hal ini membantu kita menghemat banyak waktu.
Edit dan sesuaikan App\Guestbook\Signature.php dan database/migrations/2018_03_03_032608_create_signatures_table.php (cek di github project ini).
Tahap 2. Generate Model Factory
php artisan make:factory SignatureFactory
Setelah Factory digenerate gunakan Faker untuk memproduksi data Dummy/Fake yang akan kita gunakan selama testing.
database/factories/SignatureFactory.php
Membuat seeder supaya dummy data bisa digenerate saat provisioning Vagrant / Docker.
Join table in Laravel is easy but if you don’t specified the table fields that want to be use/select it will be cause wrong data, here is my simple solution:
$quiz_responses
->leftJoin('users', 'quiz_responses.user_id', '=', 'users.id')
->leftJoin('students', function ($join) {
$join->where('users.personable_type', '=', 'Student');
$join->on('users.personable_id', '=', 'students.id');
})
->where('students.is_viewer', '', true) // jangan tampilkan viewer bila bukan viewer
->select(DB::raw('quiz_responses.*')); // hindari bentrok field
I joined the users and students tables for filtering purpose, no need to be shown in the view so the best way to avoid unwanted error is by make sure that the only table that being viewed is `quiz_responses` using following code:
//......

->select(DB::raw('quiz_responses.*')); // hindari bentrok field

//......
I just made a Laravel UnitTest to test and make sure that my create function is working and redirects user to the right url after form post submitted , this is how I make it work:
In this blog post I will show you an easy example about how to create a simple Laravel 5 Command-Line program to be executed regularly by particular time interval or specified time.
Laravel’s command scheduler allows you to fluently and expressively define your command schedule within Laravel itself. When using the scheduler, only a single Cron entry is needed on your server. Your task schedule is defined in the app/Console/Kernel.php file’s schedule method. To help you get started, a simple example is defined within the method.
Create Simple Laravel Command-Line
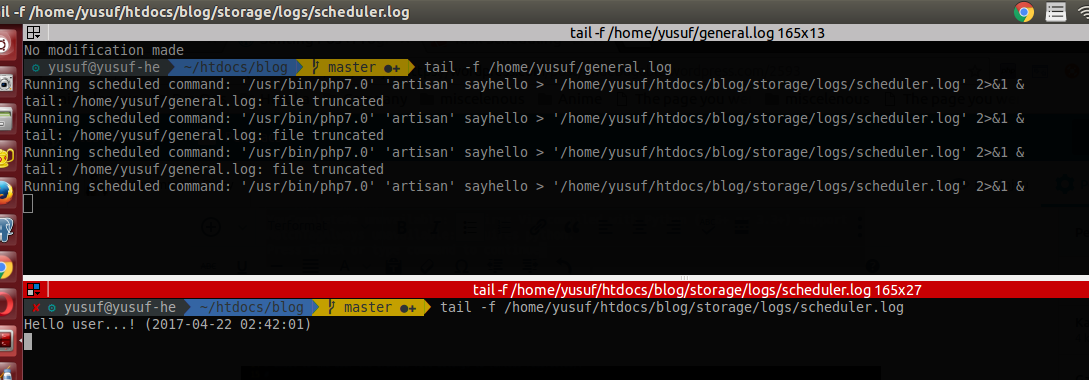
we will use two log files to store output text (I show you my real path to avoid confuse ) :
namespace App\Console\Commands;

  use Illuminate\Console\Command;

  class SayHello extends Command
  {
      protected $signature = 'sayhello';
      protected $description = 'Say Hello User';

      public function __construct()
      {
          parent::__construct();
      }

      public function handle()
      {
          $this->info('Hello user...! ('. date("Y-m-d H:i:s") .') ');
      }
  }
vim app/Console/Commands/Kernel.php
 /**
 * The Artisan commands provided by your application.
 *
 * @var array
 */
 protected $commands = [
     Commands\SayHello::class
 ];
Check out the new registered Laravel 5 Command-Line in the command list
New registered Laravel Command-line
Execute SayHello as Laravel 5 Command-Line program
Execute command line on terminal
Create Scheduler to Execute Command-Line
The next important step is about how to execute our Laravel Command-Line regularly. By using the Laravel scheduler you only need to add the following short line Cron entry to your server an then Laravel Forge will manage the Cron entries for you:
Create a log file for our Laravel scheduler storage/logs/scheduler.log: